Integrate Data with Confluent Cloud and Snowflake
Confluent is an Apache Kafka-compatible streaming data platform that provides strong data integration capabilities. On this platform, you can access, store, and manage non-stop real-time streaming data.
Starting from TiDB v6.1.0, TiCDC supports replicating incremental data to Confluent in Avro format. This document introduces how to replicate TiDB incremental data to Confluent using TiCDC, and further replicate data to Snowflake, ksqlDB, and SQL Server via Confluent Cloud. The organization of this document is as follows:
- Quickly deploy a TiDB cluster with TiCDC included.
- Create a changefeed that replicates data from TiDB to Confluent Cloud.
- Create Connectors that replicate data from Confluent Cloud to Snowflake, ksqlDB, and SQL Server.
- Write data to TiDB using go-tpc, and observe data changes in Snowflake, ksqlDB, and SQL Server.
The preceding steps are performed in a lab environment. You can also deploy a cluster in a production environment by referring to these steps.
Replicate incremental data to Confluent Cloud
Step 1. Set up the environment
Deploy a TiDB cluster with TiCDC included.
In a lab or testing environment, you can deploy a TiDB cluster with TiCDC included quickly by using TiUP Playground.
tiup playground --host 0.0.0.0 --db 1 --pd 1 --kv 1 --tiflash 0 --ticdc 1
# View cluster status
tiup status
If TiUP is not installed yet, refer to Install TiUP. In a production environment, you can deploy a TiCDC as instructed in Deploy TiCDC.
Register Confluent Cloud and create a Confluent cluster.
Create a Basic cluster and make it accessible via Internet. For details, see Quick Start for Confluent Cloud.
Step 2. Create an access key pair
Create a cluster API key.
Sign in to Confluent Cloud. Choose Data integration > API keys > Create key. On the Select scope for API key page that is displayed, select Global access.
After creation, a key pair file is generated, as shown below.
=== Confluent Cloud API key: xxx-xxxxx ===

API key:
L5WWA4GK4NAT2EQV

API secret:
xxxxxxxxxxxxxxxxxxxxxxxxxxxxxxxxxxxx

Bootstrap server:
xxx-xxxxx.ap-east-1.aws.confluent.cloud:9092
Record the Schema Registry Endpoints.
In the Confluent Cloud Console, choose Schema Registry > API endpoint. Record the Schema Registry Endpoints. The following is an example:
https://yyy-yyyyy.us-east-2.aws.confluent.cloudCreate a Schema Registry API key.
In the Confluent Cloud Console, choose Schema Registry > API credentials. Click Edit and then Create key.
After creation, a key pair file is generated, as shown below:
=== Confluent Cloud API key: yyy-yyyyy ===
API key:
7NBH2CAFM2LMGTH7
API secret:
xxxxxxxxxxxxxxxxxxxxxxxxxxxxxxxxxxxx
You can also perform this step by using Confluent CLI. For details, see Connect Confluent CLI to Confluent Cloud Cluster.
Step 3. Create a Kafka changefeed
Create a changefeed configuration file.
As required by Avro and Confluent Connector, incremental data of each table must be sent to an independent topic, and a partition must be dispatched for each event based on the primary key value. Therefore, you need to create a changefeed configuration file
changefeed.confwith the following contents:[sink] dispatchers = [ {matcher = ['*.*'], topic = "tidb_{schema}_{table}", partition="index-value"}, ]For detailed description of
dispatchersin the configuration file, see Customize the rules for Topic and Partition dispatchers of Kafka Sink.Create a changefeed to replicate incremental data to Confluent Cloud:
tiup ctl:<cluster-version> cdc changefeed create --pd="http://127.0.0.1:2379" --sink-uri="kafka://<broker_endpoint>/ticdc-meta?protocol=avro&replication-factor=3&enable-tls=true&auto-create-topic=true&sasl-mechanism=plain&sasl-user=<broker_api_key>&sasl-password=<broker_api_secret>" --schema-registry="https://<schema_registry_api_key>:<schema_registry_api_secret>@<schema_registry_endpoint>" --changefeed-id="confluent-changefeed" --config changefeed.confYou need to replace the values of the following fields with those created or recorded in Step 2. Create an access key pair:
<broker_endpoint><broker_api_key><broker_api_secret><schema_registry_api_key><schema_registry_api_secret><schema_registry_endpoint>
Note that you should encode
<schema_registry_api_secret>based on HTML URL Encoding Reference before replacing its value. After you replace all the preceding fields, the configuration file is as follows:tiup ctl:<cluster-version> cdc changefeed create --pd="http://127.0.0.1:2379" --sink-uri="kafka://xxx-xxxxx.ap-east-1.aws.confluent.cloud:9092/ticdc-meta?protocol=avro&replication-factor=3&enable-tls=true&auto-create-topic=true&sasl-mechanism=plain&sasl-user=L5WWA4GK4NAT2EQV&sasl-password=xxxxxxxxxxxxxxxxxxxxxxxxxxxxxxxxxx" --schema-registry="https://7NBH2CAFM2LMGTH7:xxxxxxxxxxxxxxxxxx@yyy-yyyyy.us-east-2.aws.confluent.cloud" --changefeed-id="confluent-changefeed" --config changefeed.confRun the command to create a changefeed.
If the changefeed is successfully created, changefeed information, such as changefeed ID, is displayed, as shown below:
Create changefeed successfully!
ID: confluent-changefeed
Info: {... changfeed info json struct ...}
If no result is returned after you run the command, check the network connectivity between the server where you run the command and Confluent Cloud. For details, see Test connectivity to Confluent Cloud.
After creating the changefeed, run the following command to check the changefeed status:
tiup ctl:<cluster-version> cdc changefeed list --pd="http://127.0.0.1:2379"You can refer to Manage TiCDC Cluster and Replication Tasks to manage the changefeed.
Step 4. Write data to generate change logs
After the preceding steps are done, TiCDC sends change logs of incremental data in the TiDB cluster to Confluent Cloud. This section describes how to write data into TiDB to generate change logs.
Simulate service workload.
To generate change logs in a lab environment, you can use go-tpc to write data to the TiDB cluster. Specifically, run the following command to create a database
tpccin the TiDB cluster. Then, use TiUP bench to write data to this new database.tiup bench tpcc -H 127.0.0.1 -P 4000 -D tpcc --warehouses 4 prepare tiup bench tpcc -H 127.0.0.1 -P 4000 -D tpcc --warehouses 4 run --time 300sFor more details about go-tpc, refer to How to Run TPC-C Test on TiDB.
Observe data in Confluent Cloud.
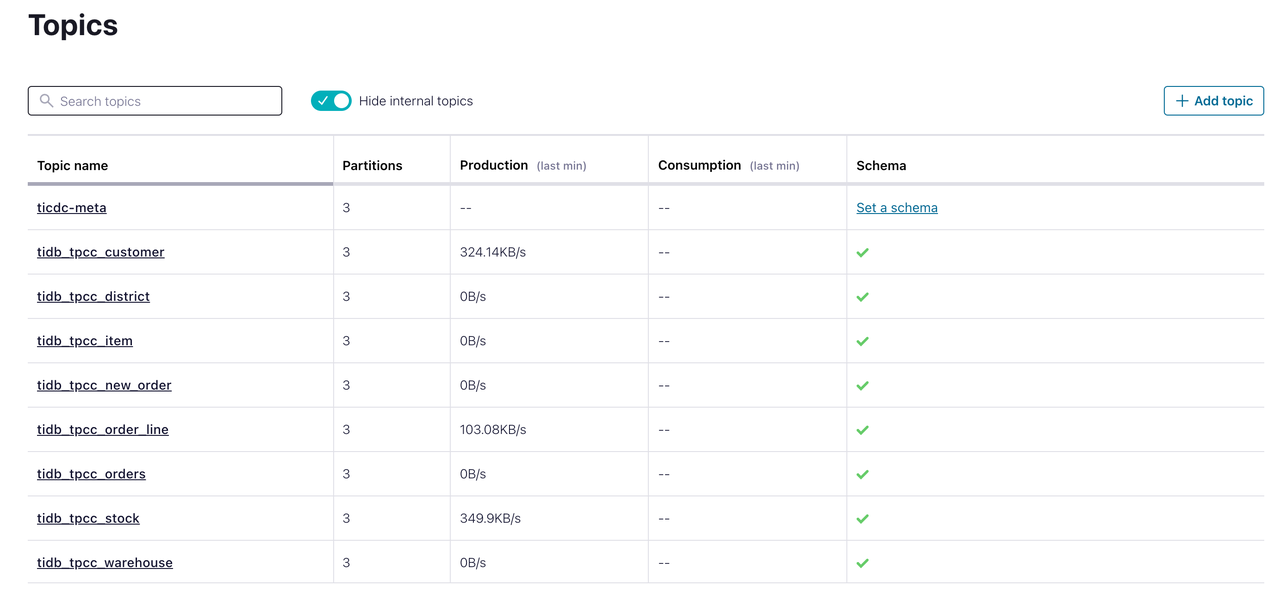
In the Confluent Cloud Console, click Topics. You can see that the target topics have been created and are receiving data. At this time, incremental data of the TiDB database is successfully replicated to Confluent Cloud.
Integrate data with Snowflake
Snowflake is a cloud native data warehouse. With Confluent, you can replicate TiDB incremental data to Snowflake by creating Snowflake Sink Connectors.
Prerequisites
- You have registered and created a Snowflake cluster. See Getting Started with Snowflake.
- Before connecting to the Snowflake cluster, you have generated a private key for it. See Key Pair Authentication & Key Pair Rotation.
Integration procedure
Create a database and a schema in Snowflake.
In the Snowflake control console, choose Data > Database. Create a database named
TPCCand a schema namedTiCDC.In the Confluent Cloud Console, choose Data integration > Connectors > Snowflake Sink. The page shown below is displayed.
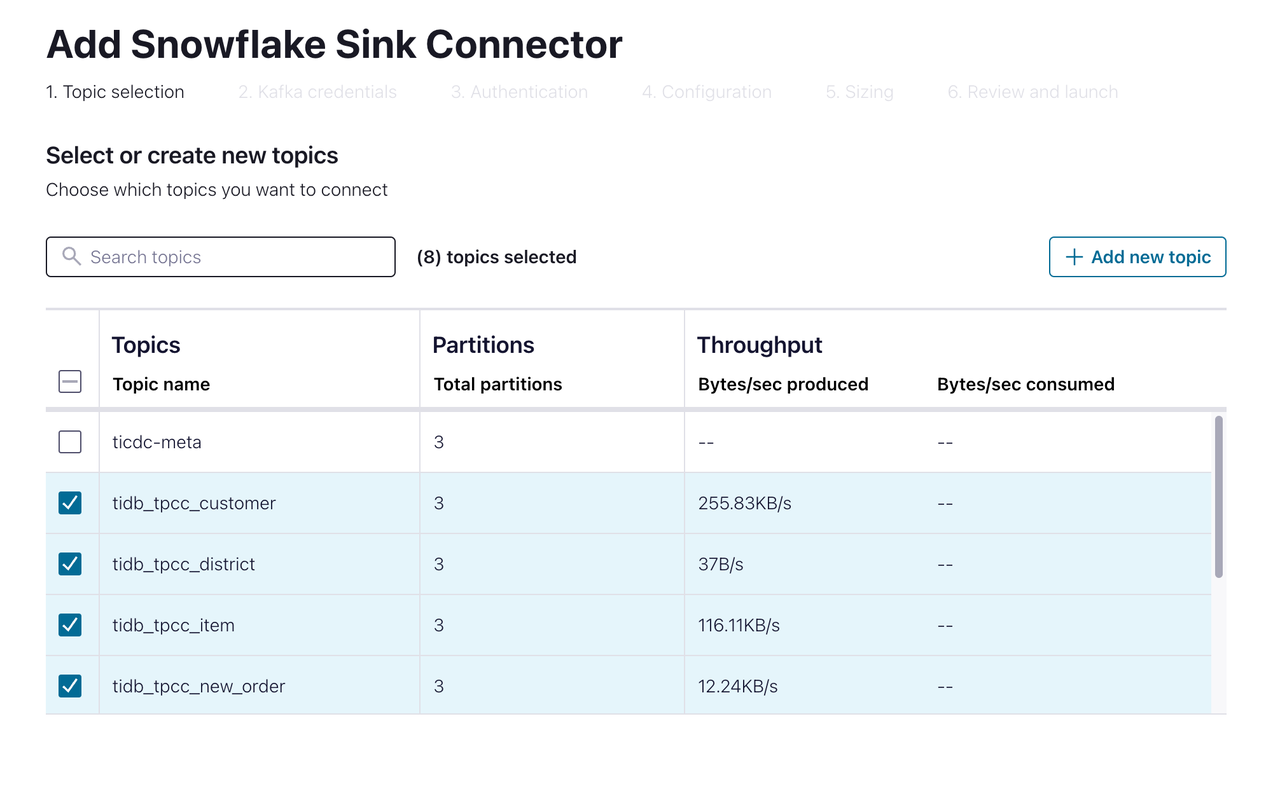
Select the topic you want to replicate to Snowflake. Then go to the next page.

Specify the authentication information for connecting Snowflake. Fill in Database name and Schema name with the values you created in the previous step. Then go to the next page.
On the Configuration page, select
AVROfor both Input Kafka record value format and Input Kafka record key format. Then click Continue. Wait until the connector is created and the status becomes Running, which might take several minutes.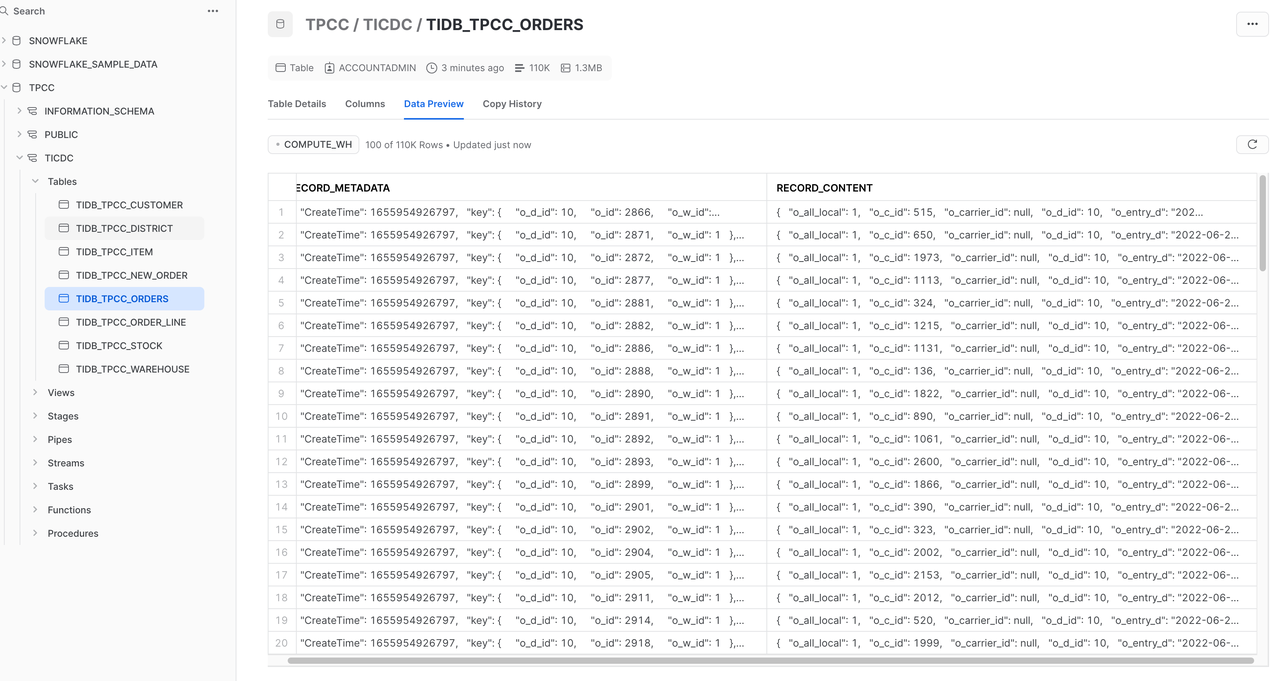
In the Snowflake console, choose Data > Database > TPCC > TiCDC. You can see that TiDB incremental data has been replicated to Snowflake. Data integration with Snowflake is done.
Integrate data with ksqlDB
ksqlDB is a database purpose-built for stream processing applications. You can create ksqlDB clusters on Confluent Cloud and access incremental data replicated by TiCDC.
Select ksqlDB in the Confluent Cloud Console and create a ksqlDB cluster as instructed.
Wait until the ksqlDB cluster status is Running. This process takes several minutes.
In the ksqlDB Editor, run the following command to create a stream to access the
tidb_tpcc_orderstopic:CREATE STREAM orders (o_id INTEGER, o_d_id INTEGER, o_w_id INTEGER, o_c_id INTEGER, o_entry_d STRING, o_carrier_id INTEGER, o_ol_cnt INTEGER, o_all_local INTEGER) WITH (kafka_topic='tidb_tpcc_orders', partitions=3, value_format='AVRO');Run the following command to check the orders STREAM data:
SELECT * FROM ORDERS EMIT CHANGES;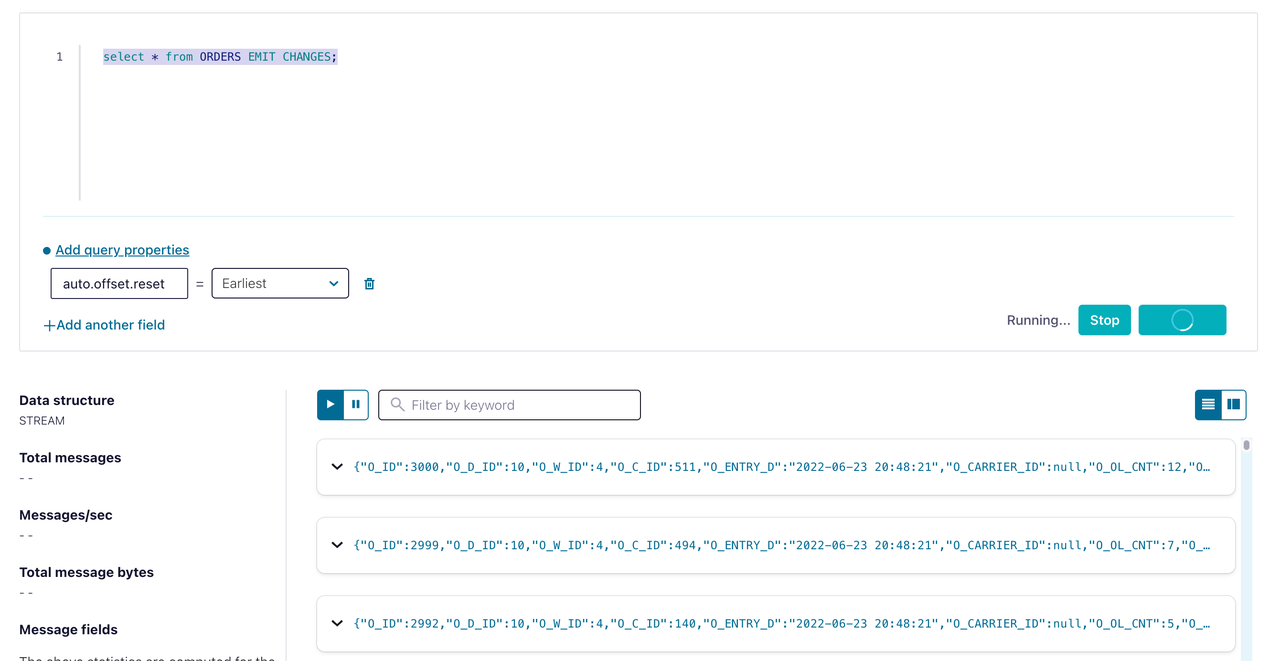
You can see that the incremental data has been replicated to ksqlDB, as shown in the preceding figure. Data integration with ksqlDB is done.
Integrate data with SQL Server
Microsoft SQL Server is a relational database management system (RDBMS) developed by Microsoft. With Confluent, you can replicate TiDB incremental data to SQL Server by creating SQL Server Sink Connectors.
Connect to SQL Server and create a database named
tpcc.[ec2-user@ip-172-1-1-1 bin]$ sqlcmd -S 10.61.43.14,1433 -U admin Password: 1> create database tpcc 2> go 1> select name from master.dbo.sysdatabases 2> go name ---------------------------------------------------------------------- master tempdb model msdb rdsadmin tpcc (6 rows affected)In the Confluent Cloud Console, choose Data integration > Connectors > Microsoft SQL Server Sink. The page shown below is displayed.
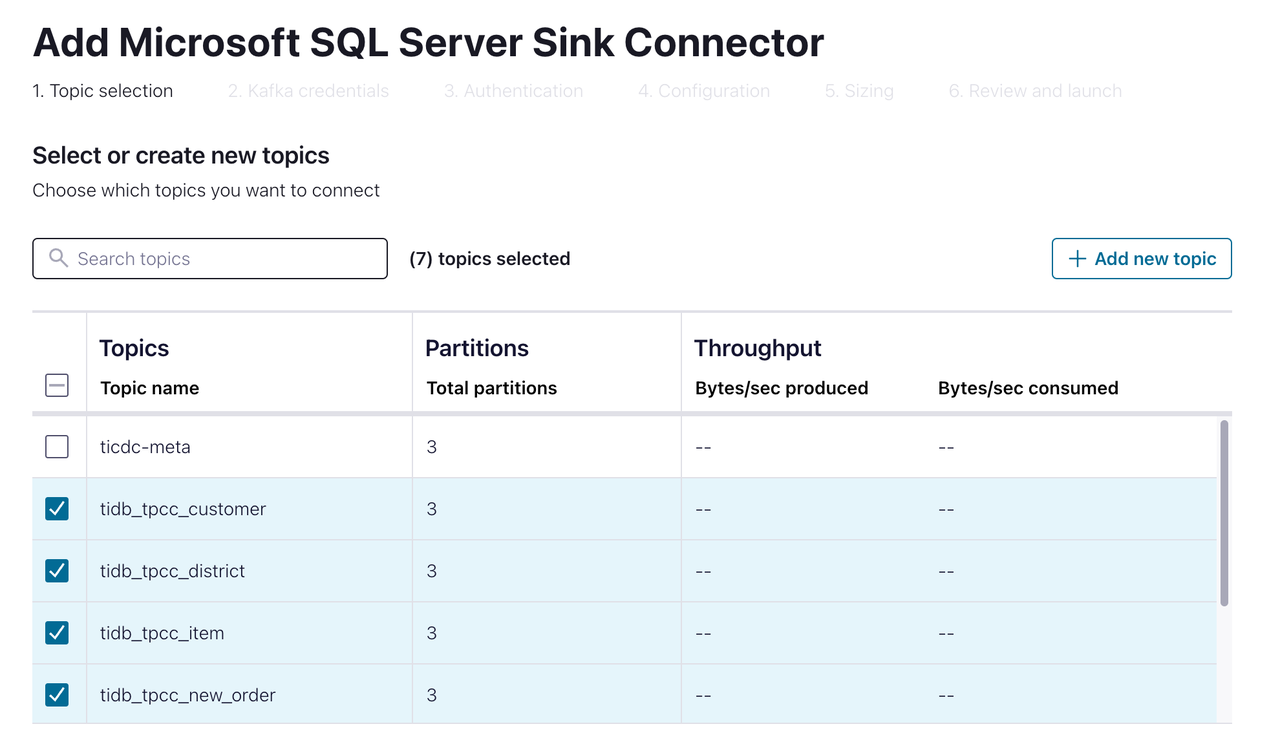
Select the topic you want to replicate to SQL Server. Then go to the next page.
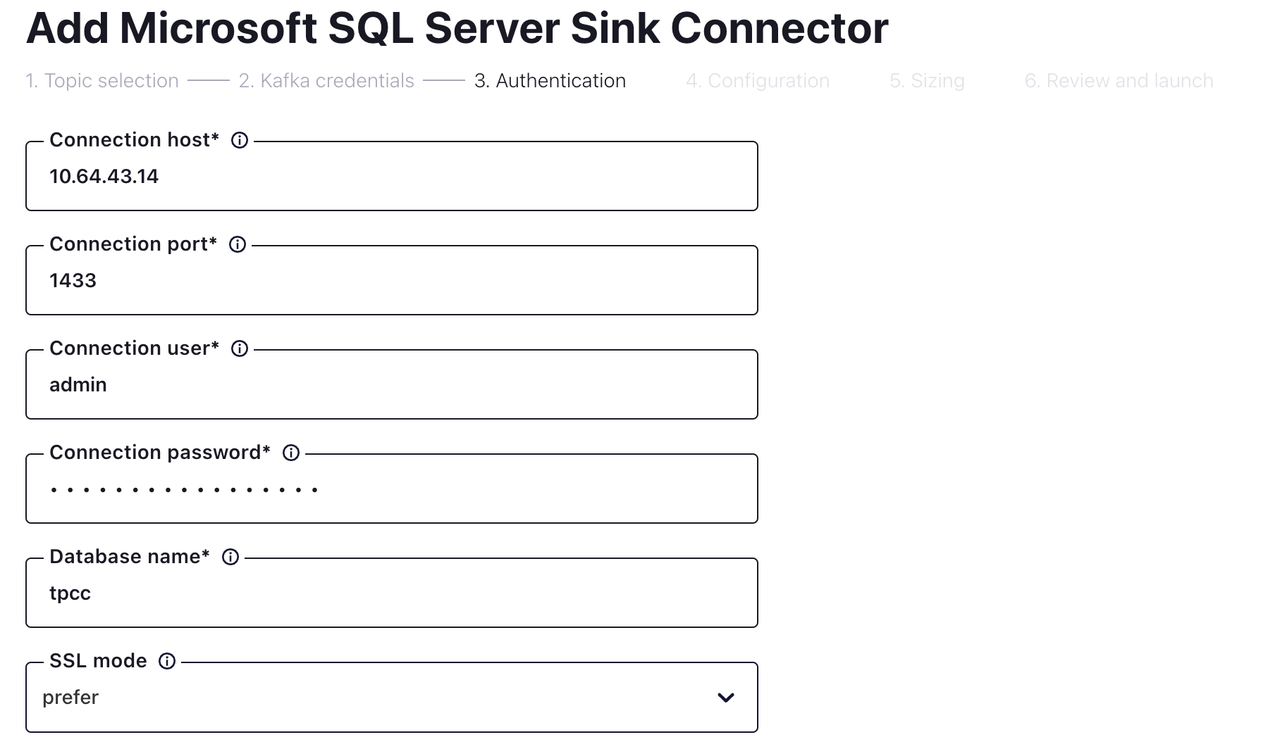
Fill in the connection and authentication information. Then go to the next page.
On the Configuration page, configure the following fields and click Continue.
Field Value Input Kafka record value format AVRO Insert mode UPSERT Auto create table true Auto add columns true PK mode record_key Input Kafka record key format AVRO Delete on null true After configuration, click Continue. Wait until the connector status becomes Running, which might take several minutes.
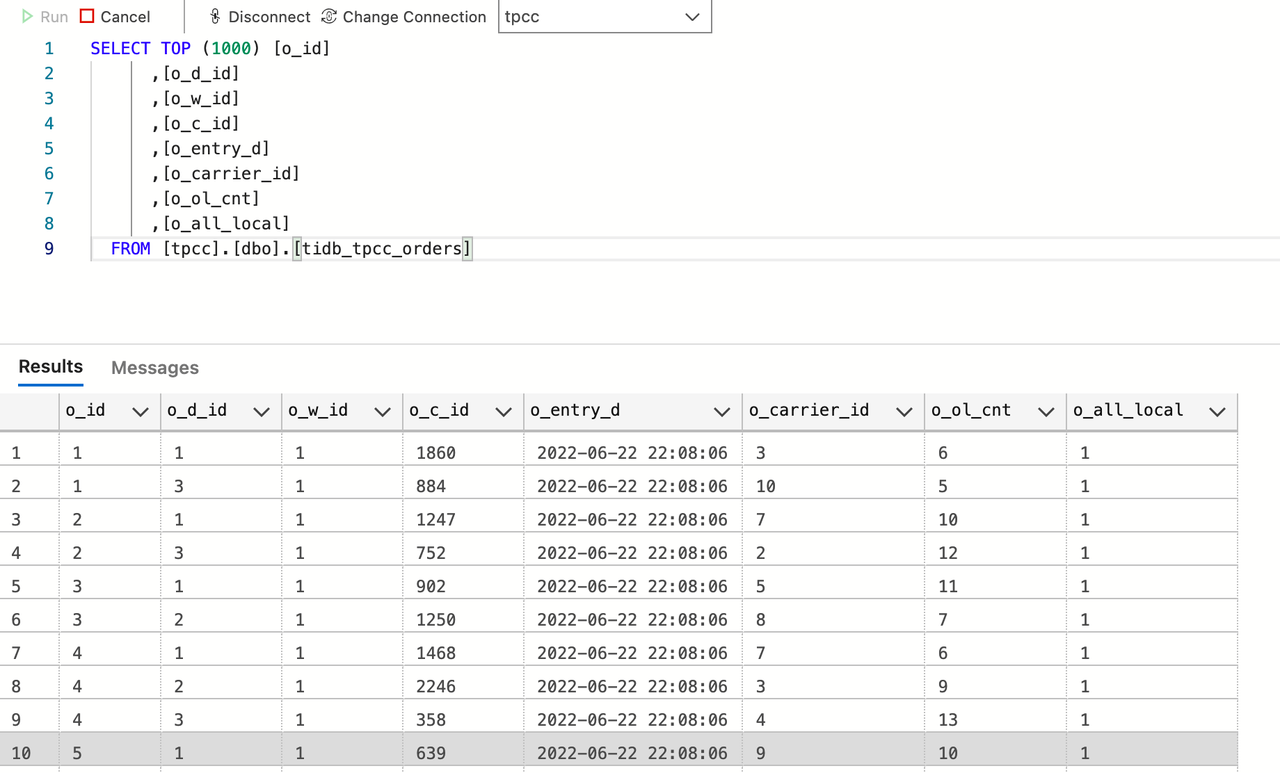
Connect SQL Server and observe the data. You can see that the incremental data has been replicated to SQL Server, as shown in the preceding figure. Data integration with SQL Server is done.