TiDB Scheduler
TiDB Scheduler is a TiDB implementation of Kubernetes scheduler extender. TiDB Scheduler is used to add new scheduling rules to Kubernetes. This document introduces these new scheduling rules and how TiDB Scheduler works.
TiDB cluster scheduling requirements
A TiDB cluster includes three key components: PD, TiKV, and TiDB. Each consists of multiple nodes: PD is a Raft cluster, and TiKV is a multi-Raft group cluster. PD and TiKV components are stateful. The default scheduling rules of the Kubernetes scheduler cannot meet the high availability scheduling requirements of the TiDB cluster, so the Kubernetes scheduling rules need to be extended.
Currently, pods can be scheduled according to specific dimensions by modifying metadata.annotations in TidbCluster, such as:
metadata:
  annotations:
    pingcap.com/ha-topology-key: kubernetes.io/hostname
Or by modifying tidb-cluster Chart values.yaml:
haTopologyKey: kubernetes.io/hostname
The configuration above indicates scheduling by the node dimension (default). If you want to schedule pods by other dimensions, such as pingcap.com/ha-topology-key: zone, which means scheduling by zone, each node should also be labeled as follows:
kubectl label nodes node1 zone=zone1
Different nodes may have different labels or the same label, and if a node is not labeled, the scheduler will not schedule any pod to that node.
TiDB Scheduler implements the following customized scheduling rules. The following example is based on node scheduling, scheduling rules based on other dimensions are the same.
PD component
Scheduling rule 1: Make sure that the number of PD instances scheduled on each node is less than Replicas / 2. For example:
| PD cluster size (Replicas) | Maximum number of PD instances that can be scheduled on each node |
|---|---|
| 1 | 1 |
| 2 | 1 |
| 3 | 1 |
| 4 | 1 |
| 5 | 2 |
| ... |
TiKV component
Scheduling rule 2: If the number of Kubernetes nodes is less than three (in this case, TiKV cannot achieve high availability), scheduling is not limited; otherwise, the number of TiKV instances that can be scheduled on each node is no more than ceil(Replicas / 3). For example:
| TiKV cluster size (Replicas) | Maximum number of TiKV instances that can be scheduled on each node | Best scheduling distribution |
|---|---|---|
| 3 | 1 | 1,1,1 |
| 4 | 2 | 1,1,2 |
| 5 | 2 | 1,2,2 |
| 6 | 2 | 2,2,2 |
| 7 | 3 | 2,2,3 |
| 8 | 3 | 2,3,3 |
| ... |
TiDB component
Scheduling rule 3: When you perform a rolling update to a TiDB instance, the instance tends to be scheduled back to its original node.
This ensures stable scheduling and is helpful for the scenario of manually configuring Node IP and NodePort to the LB backend. It can reduce the impact on the cluster during the rolling update because you do not need to adjust the LB configuration when the Node IP is changed after the upgrade.
How TiDB Scheduler works

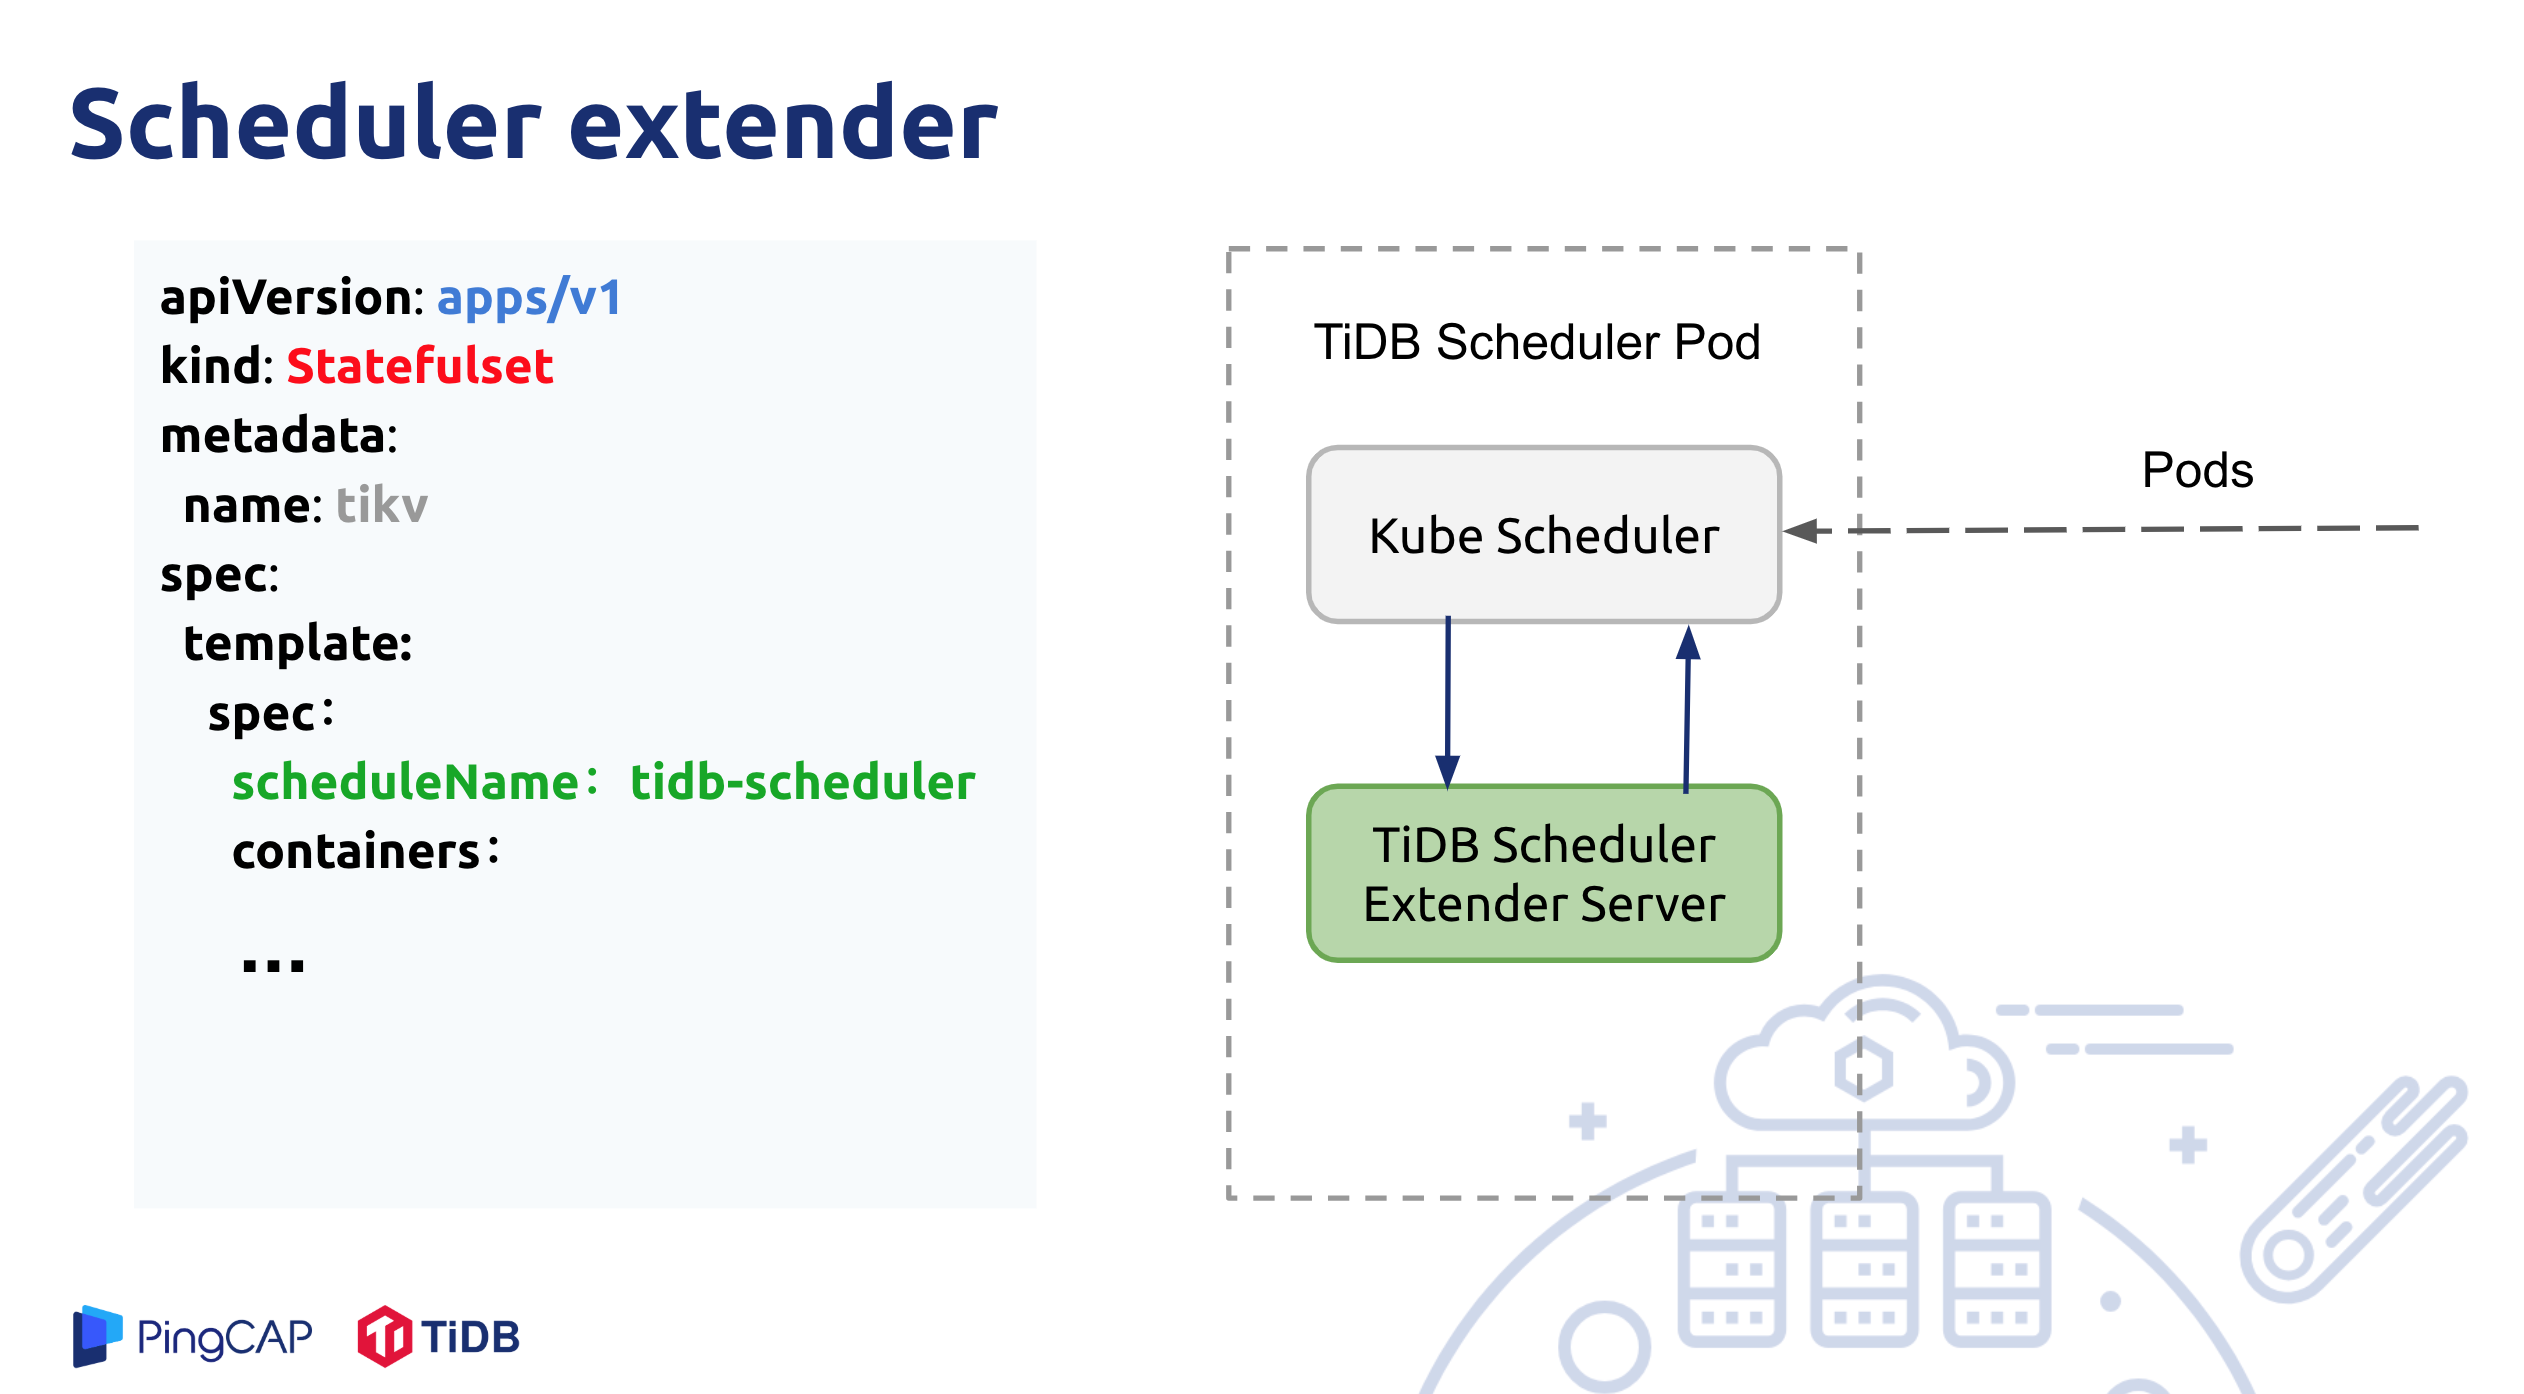
TiDB Scheduler adds customized scheduling rules by implementing Kubernetes Scheduler extender.
The TiDB Scheduler component is deployed as one or more Pods, though only one Pod is working at the same time. Each Pod has two Containers inside: one Container is a native kube-scheduler, and the other is a tidb-scheduler implemented as a Kubernetes scheduler extender.
The .spec.schedulerName attribute of PD, TiDB, and TiKV Pods created by the TiDB Operator is set to tidb-scheduler. This means that the TiDB Scheduler is used for the scheduling.
If you are using a testing cluster and do not require high availability, you can change .spec.schedulerName into default-scheduler to use the built-in Kubernetes scheduler.
The scheduling process of a Pod is as follows:
- First,
kube-schedulerpulls all Pods whose.spec.schedulerNameistidb-scheduler. And Each Pod is filtered using the default Kubernetes scheduling rules. - Then,
kube-schedulersends a request to thetidb-schedulerservice. Thentidb-schedulerfilters the sent nodes through the customized scheduling rules (as mentioned above), and returns schedulable nodes tokube-scheduler. - Finally,
kube-schedulerdetermines the nodes to be scheduled.
If a Pod cannot be scheduled, see the troubleshooting document to diagnose and solve the issue.