TiDB 集群监控
TiDB 提供了以下两种接口来监控集群状态:
- 状态接口:通过 HTTP 接口对外汇报组件的信息。
- Metrics 接口:使用 Prometheus 记录组件中各种操作的详细信息,使用 Grafana 进行可视化展示。
使用状态接口
状态接口用于监控组件的一些基本信息,并且可以作为 keepalive 的监测接口。另外,通过 PD 的状态接口可以看到整个 TiKV 集群的详细信息。
TiDB Server
- TiDB API 地址:
http://${host}:${port} - 默认端口:10080
- 各类
api_name详细信息:参见 TiDB API 文档
以下示例中,通过访问 http://${host}:${port}/status 获取当前 TiDB Server 的状态,并判断该 TiDB Server 是否存活。结果以 JSON 格式返回:
curl http://127.0.0.1:10080/status
{
    connections: 0,  # 当前 TiDB Server 上的客户端连接数
    version: "5.7.25-TiDB-v3.0.0-beta-250-g778c3f4a5",  # TiDB 版本号
    git_hash: "778c3f4a5a716880bcd1d71b257c8165685f0d70"  # TiDB 当前代码的 Git Hash
}
PD Server
- PD API 地址:
http://${host}:${port}/pd/api/v1/${api_name} - 默认端口:2379
- 各类
api_name详细信息:参见 PD API Doc
通过该接口可以获取当前所有 TiKV 节点的状态以及负载均衡信息。下面以一个单节点的 TiKV 集群为例,说明用户需要了解的信息:
curl http://127.0.0.1:2379/pd/api/v1/stores
{
  "count": 1,  # TiKV 节点数量
  "stores": [  # TiKV 节点的列表
    # 集群中单个 TiKV 节点的信息
    {
      "store": {
        "id": 1,
        "address": "127.0.0.1:20160",
        "version": "3.0.0-beta",
        "state_name": "Up"
      },
      "status": {
        "capacity": "20 GiB",  # 存储总容量
        "available": "16 GiB",  # 存储剩余容量
        "leader_count": 17,
        "leader_weight": 1,
        "leader_score": 17,
        "leader_size": 17,
        "region_count": 17,
        "region_weight": 1,
        "region_score": 17,
        "region_size": 17,
        "start_ts": "2019-03-21T14:09:32+08:00",  # 启动时间
        "last_heartbeat_ts": "2019-03-21T14:14:22.961171958+08:00",  # 最后一次心跳的时间
        "uptime": "4m50.961171958s"
      }
    }
  ]
使用 metrics 接口
Metrics 接口用于监控整个集群的状态和性能。
- 如果使用 TiDB Ansible 部署 TiDB 集群,监控系统(Prometheus 和 Grafana)会同时部署。
- 如果使用其他方式部署 TiDB 集群,在使用 metrics 接口前,需先部署 Prometheus 和 Grafana。
成功部署 Prometheus 和 Grafana 之后,配置 Grafana。
部署 Prometheus 和 Grafana
假设 TiDB 的拓扑结构如下:
| 节点 | 主机 IP | 服务 |
|---|---|---|
| Node1 | 192.168.199.113 | PD1, TiDB, node_export, Prometheus, Grafana |
| Node2 | 192.168.199.114 | PD2, node_export |
| Node3 | 192.168.199.115 | PD3, node_export |
| Node4 | 192.168.199.116 | TiKV1, node_export |
| Node5 | 192.168.199.117 | TiKV2, node_export |
| Node6 | 192.168.199.118 | TiKV3, node_export |
第 1 步:下载二进制包
下载二进制包:
wget https://download.pingcap.org/prometheus-2.8.1.linux-amd64.tar.gz
wget https://download.pingcap.org/node_exporter-0.17.0.linux-amd64.tar.gz
wget https://download.pingcap.org/grafana-6.1.6.linux-amd64.tar.gz
解压二进制包:
tar -xzf prometheus-2.8.1.linux-amd64.tar.gz
tar -xzf node_exporter-0.17.0.linux-amd64.tar.gz
tar -xzf grafana-6.1.6.linux-amd64.tar.gz
第 2 步:在 Node1,Node2,Node3,Node4 上启动 node_exporter
cd node_exporter-0.17.0.linux-amd64
启动 node_exporter 服务:
./node_exporter --web.listen-address=":9100" \
    --log.level="info" &
第 3 步:在 Node1 上启动 Prometheus
编辑 Prometheus 的配置文件:
cd prometheus-2.8.1.linux-amd64 &&
vi prometheus.yml
...

global:
  scrape_interval:     15s
  evaluation_interval: 15s
  # scrape_timeout 设置为全局默认值 (10s)
  external_labels:
    cluster: 'test-cluster'
    monitor: "prometheus"

scrape_configs:
  - job_name: 'overwritten-nodes'
    honor_labels: true  # 不要覆盖 job 和实例的 label
    static_configs:
    - targets:
      - '192.168.199.113:9100'
      - '192.168.199.114:9100'
      - '192.168.199.115:9100'
      - '192.168.199.116:9100'
      - '192.168.199.117:9100'
      - '192.168.199.118:9100'

  - job_name: 'tidb'
    honor_labels: true  # 不要覆盖 job 和实例的 label
    static_configs:
    - targets:
      - '192.168.199.113:10080'

  - job_name: 'pd'
    honor_labels: true  # 不要覆盖 job 和实例的 label
    static_configs:
    - targets:
      - '192.168.199.113:2379'
      - '192.168.199.114:2379'
      - '192.168.199.115:2379'

  - job_name: 'tikv'
    honor_labels: true  # 不要覆盖 job 和实例的 label
    static_configs:
    - targets:
      - '192.168.199.116:20180'
      - '192.168.199.117:20180'
      - '192.168.199.118:20180'

...
启动 Prometheus 服务:
./prometheus \
    --config.file="./prometheus.yml" \
    --web.listen-address=":9090" \
    --web.external-url="http://192.168.199.113:9090/" \
    --web.enable-admin-api \
    --log.level="info" \
    --storage.tsdb.path="./data.metrics" \
    --storage.tsdb.retention="15d" &
第 4 步:在 Node1 上启动 Grafana
编辑 Grafana 的配置文件:
cd grafana-6.1.6 &&
vi conf/grafana.ini
...

[paths]
data = ./data
logs = ./data/log
plugins = ./data/plugins
[server]
http_port = 3000
domain = 192.168.199.113
[database]
[session]
[analytics]
check_for_updates = true
[security]
admin_user = admin
admin_password = admin
[snapshots]
[users]
[auth.anonymous]
[auth.basic]
[auth.ldap]
[smtp]
[emails]
[log]
mode = file
[log.console]
[log.file]
level = info
format = text
[log.syslog]
[event_publisher]
[dashboards.json]
enabled = false
path = ./data/dashboards
[metrics]
[grafana_net]
url = https://grafana.net

...
启动 Grafana 服务:
./bin/grafana-server \
    --config="./conf/grafana.ini" &
配置 Grafana
本小节介绍如何配置 Grafana。
第 1 步:添加 Prometheus 数据源
登录 Grafana 界面。
- 默认地址:
http://localhost:3000 - 默认账户:admin
- 默认密码:admin
- 默认地址:
点击 Grafana 侧边栏菜单 Configuration 中的 Data Source。
点击 Add data source。
指定数据源的相关信息:
- 在 Name 处,为数据源指定一个名称。
- 在 Type 处,选择 Prometheus。
- 在 URL 处,指定 Prometheus 的 IP 地址。
- 根据需求指定其它字段。
点击 Add 保存新的数据源。
第 2 步:导入 Grafana 面板
执行以下步骤,为 PD Server、TiKV Server 和 TiDB Server 分别导入 Grafana 面板:
点击侧边栏的 Grafana 图标。
在侧边栏菜单中,依次点击 Dashboards > Import 打开 Import Dashboard 窗口。
点击 Upload .json File 上传对应的 JSON 文件(下载 TiDB Grafana 配置文件)。
点击 Load。
选择一个 Prometheus 数据源。
点击 Import,Prometheus 面板即导入成功。
查看组件 metrics
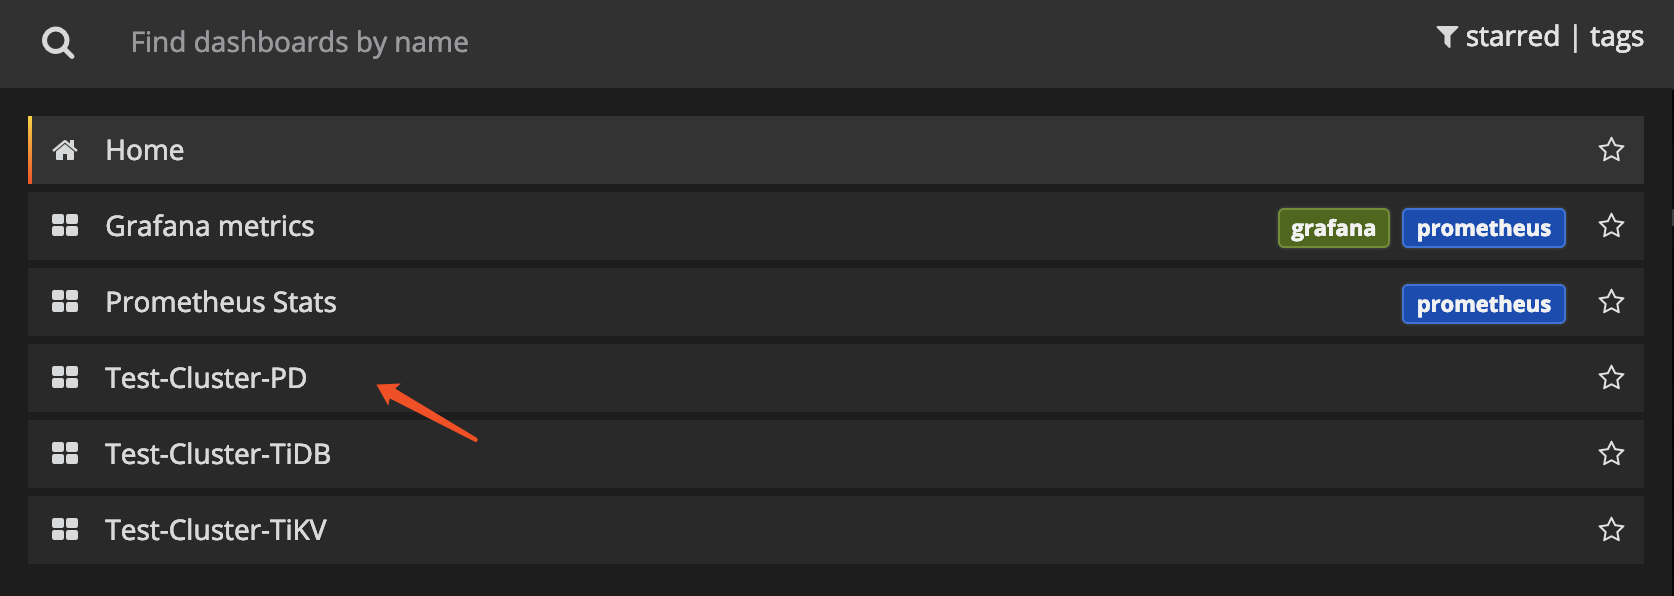
在顶部菜单中,点击 New dashboard,选择要查看的面板。

可查看以下集群组件信息:
TiDB Server:
- query 处理时间,可以看到延迟和吞吐
- ddl 过程监控
- TiKV client 相关的监控
- PD client 相关的监控
PD Server:
- 命令执行的总次数
- 某个命令执行失败的总次数
- 某个命令执行成功的耗时统计
- 某个命令执行失败的耗时统计
- 某个命令执行完成并返回结果的耗时统计
TiKV Server:
- GC 监控
- 执行 KV 命令的总次数
- Scheduler 执行命令的耗时统计
- Raft propose 命令的总次数
- Raft 执行命令的耗时统计
- Raft 执行命令失败的总次数
- Raft 处理 ready 状态的总次数